
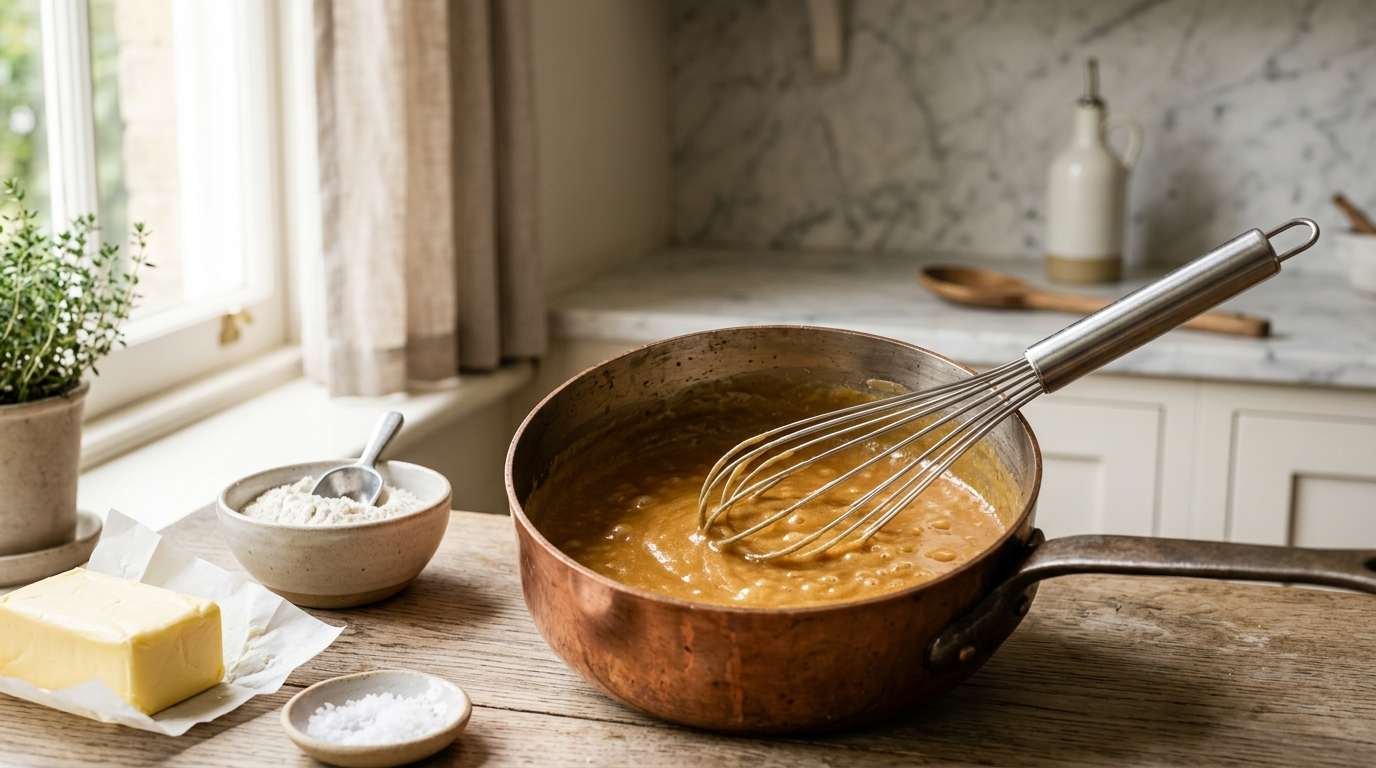

A classic roux is one of the most useful foundations in traditional cooking. Made from just fat and flour, this simple mixture can transform thin liquids into smooth, rich sauces, gravies, soups, and creamy casseroles.
The technique is straightforward, but small details matter. The temperature of the pan, the ratio of flour to fat, how long the mixture cooks, and how liquid is incorporated can all determine whether the finished sauce is silky or lumpy.
Once we understand the basic formula, making a roux becomes much less intimidating. We can use the same technique for everything from a delicate white sauce to a deeply flavored brown gravy.
Table of Contents
What Is a Classic Roux?
A roux is a cooked mixture of fat and flour used primarily to thicken liquids.
The most traditional version combines butter and wheat flour, although other fats can be used. The flour is cooked in the fat before liquid is added, which removes the raw flour taste and creates the thickening foundation for the finished sauce.
A classic roux can be cooked to different stages depending on the dish.
The main varieties are:
- White roux – cooked briefly and kept very pale
- Blond roux – cooked slightly longer for a light golden color
- Brown roux – cooked until noticeably brown and nutty
- Dark roux – cooked for an extended period to develop deep color and flavor
The longer we cook the roux, the more its flavor develops, but its thickening power gradually decreases.
Classic Roux Ratio
The easiest way to remember a traditional roux is to use approximately equal weights of fat and flour.
For a basic small batch, we can use:
- 2 tablespoons butter
- 2 tablespoons all-purpose flour
- 1 cup milk, stock, or another suitable liquid
The exact amount of liquid depends on the desired consistency.
For a thicker sauce, we use more roux relative to the liquid. For a thinner sauce, we increase the amount of liquid.
Using weight measurements gives us the greatest consistency because tablespoons of flour can vary depending on how densely the flour is packed.
For everyday home cooking, however, the equal-volume butter-and-flour approach is a practical starting point.
Ingredients for a Classic Roux
Butter
Unsalted butter is an excellent choice for a classic roux because it provides richness and allows us to control the amount of salt added later.
Butter also contributes flavor, making it particularly suitable for cream sauces, béchamel, macaroni and cheese, and other delicate preparations.
Flour
All-purpose flour is the standard choice for most traditional roux-based sauces.
The flour provides starch, which absorbs liquid and expands during cooking. This is what gives the finished sauce its thickened consistency.
We should avoid adding flour directly to the liquid when making a traditional roux. Cooking it first in fat helps distribute the starch and produces a smoother result.
Liquid
The liquid depends on the recipe.
We can use:
- Milk for creamy sauces
- Chicken stock for poultry gravies
- Beef stock for richer gravies
- Vegetable stock for vegetable dishes
- Seafood stock for seafood sauces
- Cream for especially rich preparations
The liquid can be warm or cool, although adding it gradually while whisking is particularly helpful for maintaining a smooth texture.
How to Make a Classic Roux Step by Step
Step 1: Melt the Butter
Place the butter in a saucepan over medium-low to medium heat.
Allow it to melt completely without letting it brown unless the recipe specifically calls for a darker roux.
If using unsalted butter, we can control the seasoning later.
Step 2: Add the Flour
Once the butter has melted, add an equal amount of flour.
Whisk immediately.
The flour should become coated with the melted butter, producing a smooth paste.
At this point, the mixture may look thick and slightly grainy. That is normal.
Step 3: Cook the Flour
Continue stirring or whisking the mixture as it cooks.
For a white roux, we only need to cook it briefly—usually long enough to remove the raw flour aroma.
The mixture should remain pale.
For a blond or brown roux, continue cooking until the desired color develops.
This stage is important because the color of the roux directly affects both flavor and thickening ability.
Step 4: Add the Liquid Gradually
Slowly add the liquid while whisking continuously.
Adding a small amount first allows us to loosen the roux before incorporating the remaining liquid.
Keep whisking as the sauce becomes smoother.
If we add a large quantity of liquid all at once, lumps can sometimes develop, particularly if the roux is very hot.
Step 5: Simmer Until Thickened
Bring the sauce to a gentle simmer.
As the mixture heats, the starch in the flour begins to thicken the liquid.
Continue cooking for several minutes while stirring frequently.
The sauce should gradually become smooth, glossy, and thick enough to coat the back of a spoon.
Avoid relying solely on the appearance immediately after adding the liquid. A roux-based sauce often continues thickening as it heats.
White, Blond, Brown, and Dark Roux
The color of a roux isn’t simply cosmetic. It changes the character of the finished dish.
White Roux
A white roux remains pale because it is cooked only briefly.
It provides strong thickening power while contributing relatively little additional flavor.
White roux is commonly used for creamy sauces such as béchamel.
Blond Roux
A blond roux is cooked until it develops a light golden color.
It has a slightly more developed, nutty flavor while still retaining considerable thickening power.
This is useful when we want more flavor without the deep color associated with a brown roux.
Brown Roux
A brown roux is cooked longer until it becomes distinctly brown.
The flour develops deeper roasted and nutty flavors.
Because the flour has been cooked for longer, the roux generally has less thickening power than a white roux.
Brown roux works particularly well in rich gravies and dishes where a deeper color and flavor are desirable.
Dark Roux
A dark roux is cooked until it becomes deeply brown.
It delivers an intense, toasted flavor and is particularly associated with certain traditional dishes from Louisiana cuisine.
The trade-off is significant: the darker the roux becomes, the less effective it is as a thickener.
Dark roux therefore requires careful attention because the difference between beautifully developed and burnt can be small.
How Much Roux Do We Need?
The amount of roux required depends on how thick we want the final sauce to be.
As a practical starting point, we can use approximately:
| Desired consistency | Approximate approach |
|---|---|
| Light sauce | Less roux or more liquid |
| Medium sauce | Balanced roux-to-liquid ratio |
| Thick sauce | More roux relative to liquid |
| Very thick filling | Higher concentration of roux |
The exact ratio can vary depending on the recipe, the type of liquid, cooking time, and desired final texture.
For sauces, the goal should be smooth and spoon-coating rather than excessively stiff.
How to Prevent Lumps in a Roux-Based Sauce
Lumps are one of the most common problems when making a roux sauce.
Fortunately, they are usually preventable.
Whisk continuously
Once the liquid is introduced, consistent whisking helps distribute the flour evenly.
Add liquid gradually
Start with a small amount of liquid and whisk until completely smooth before adding more.
Don’t use excessive heat
Very high heat can cause the mixture to thicken too rapidly and makes it harder to maintain a smooth texture.
Cook the flour properly
Raw flour that has not been evenly incorporated into the fat can create an uneven mixture.
Strain when necessary
If a sauce does develop stubborn lumps, passing it through a fine-mesh strainer can rescue the texture.
Common Classic Roux Mistakes
Burning the Roux
A roux can burn surprisingly quickly, especially once it becomes brown.
We should stay near the pan and stir frequently.
If the roux smells acrid or burnt, it is generally better to start again. Burnt flour can make an entire sauce bitter.
Using Too Much Flour
An excessive amount of flour can produce a heavy, pasty sauce.
The goal is not simply maximum thickness. A good sauce should have a pleasant texture and flow naturally.
Adding Liquid Too Quickly
Dumping all the liquid into a hot roux can make smooth incorporation more difficult.
Gradual addition gives us greater control.
Forgetting to Cook the Finished Sauce
Even after the liquid has been incorporated, the sauce needs time to cook.
A brief simmer allows the flour to fully hydrate and eliminates the raw flour flavor.
Stopping Too Early
A sauce may initially look thinner than expected.
Before adding additional roux, give it time to heat and thicken. Otherwise, we can accidentally create a sauce that becomes excessively thick.
Can We Make Roux With Oil Instead of Butter?
Yes.
Although butter is traditional for many classic sauces, oil can be used to make roux.
Neutral oils work particularly well when we want a neutral flavor or when cooking at temperatures where butter would be less suitable.
Other fats can also be used depending on the dish.
The important principle remains the same: the flour needs to be thoroughly coated in fat and cooked to the appropriate stage before liquid is introduced.
Can We Make a Gluten-Free Roux?
A traditional roux uses wheat flour, so it isn’t naturally gluten-free.
However, alternative flours and starches can sometimes be used.
For a gluten-free preparation, a gluten-free flour blend designed for sauces can work, although its behavior may differ from conventional wheat flour.
Cornstarch is another common thickener, but it isn’t technically a roux because it doesn’t follow the traditional fat-and-flour method.
For the most predictable result, we should choose the thickening method based on the texture and flavor required by the recipe.
Best Uses for a Classic Roux
A well-made roux can become the foundation for numerous dishes.
Béchamel Sauce
White roux combined with milk creates the foundation of béchamel, one of the classic French mother sauces.
We can season it with salt, pepper, and nutmeg and use it in pasta dishes, vegetables, lasagna, and gratins.
Cheese Sauce
A roux can form the foundation for a smooth cheese sauce.
Once the milk-based sauce has thickened, grated cheese can be incorporated gradually.
This creates the creamy base used for dishes such as macaroni and cheese.
Gravy
Stock combined with a blond or brown roux produces a rich gravy suitable for roasted meats, poultry, mashed potatoes, and other savory dishes.
Cream Soups
Many creamy soups begin with a roux-based foundation.
The roux helps provide body and creates a silky consistency without requiring excessive amounts of cream.
Casseroles
Roux-based sauces are useful in casseroles because they bind ingredients together while adding moisture and richness.
How to Fix a Roux Sauce That Is Too Thick
If the finished sauce is thicker than desired, there is usually an easy solution.
Add more liquid gradually while whisking.
Milk, stock, water, or another liquid appropriate to the recipe can be used.
We should add only a little at a time because a sauce can move from too thick to too thin surprisingly quickly.
Once the desired consistency is reached, taste and adjust the seasoning.
How to Fix a Roux Sauce That Is Too Thin
If the sauce remains too thin, first allow it to simmer gently for a little longer.
If additional thickening is still necessary, we can prepare a small amount of fresh roux separately and incorporate it carefully.
Another option is to use an appropriate starch slurry, although this changes the traditional method and can affect the finished texture.
Avoid adding dry flour directly to an already prepared sauce because it can create raw flour flavor and unpleasant lumps.
How to Store Roux
A prepared roux can be made ahead of time and stored for later cooking.
Once cooled, it should be placed in an airtight container and refrigerated.
We should label it with the date and use appropriate food-storage practices.
Prepared roux can make weeknight cooking easier because the foundational step has already been completed.
The Classic Roux Blueprint
The beauty of a classic roux is its simplicity.
Fat + flour + controlled heat + liquid = a versatile thickening foundation.
The technique becomes much easier once we understand what each stage is doing.
We melt the fat, incorporate the flour, cook it to the appropriate color, gradually add liquid, and simmer until the desired consistency develops.
From there, the same basic technique can produce creamy white sauces, rich gravies, cheese sauces, soups, and hearty casserole fillings.
A classic roux isn’t complicated cooking. It is foundational cooking—one simple technique that gives us greater control over texture, flavor, and consistency across countless dishes.
Once this method becomes familiar, we can stop treating sauces as mysterious recipes and start understanding the blueprint behind them.
Frequently Asked Questions
What is the basic ratio for a classic roux?
A practical starting point is equal weights of fat and flour. For everyday cooking, equal tablespoons of butter and flour are also commonly used as a convenient approximation.
How long should we cook a roux?
It depends on the type. A white roux requires only a short cooking period, while blond, brown, and dark roux require progressively longer cooking to develop color and flavor.
Why does my roux taste like flour?
The flour may not have been cooked long enough. A brief cooking period before adding liquid helps remove the raw flour taste.
Why did my roux become lumpy?
Lumps can result from adding liquid too quickly, insufficient whisking, uneven incorporation, or excessive heat. Adding liquid gradually while whisking is one of the simplest ways to prevent them.
Is darker roux better?
Not necessarily. A darker roux offers more developed, toasted flavor but provides less thickening power. The best roux is the one that suits the dish.
Can we make roux ahead of time?
Yes. Roux can be prepared ahead and refrigerated in an airtight container, making it a useful component for future sauces and gravies.





Leave a Reply